Teardown| Vizio Coaster Co-Star Teardown Tutorial

ashley

Member
Introduction
It's been nearly two years since Google unveiled its flop of a streaming media player, the Logitech Revue. After a lengthy hiatus from the spotlight, Google TV is back to take the stage. Its lead actor? The ironically-named Vizio Coaster Co-Star.

Step 1 Vizio Co-Star Teardown
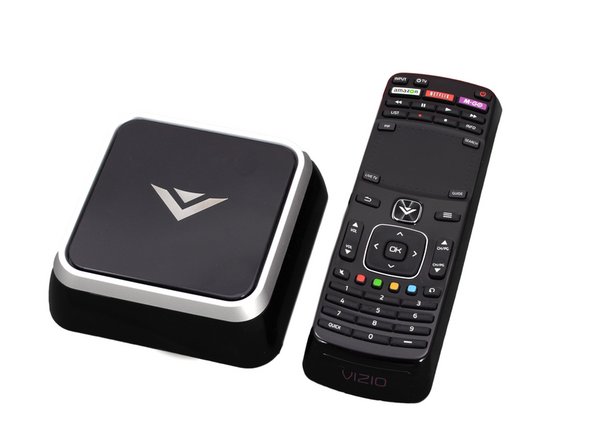
Providing the market with a $99 answer to the Apple TV (also $99), the Vizio Co-Star brings a refreshing reincarnation of Google TV to the world of set-top boxes.

[*]Providing the market with a $99 answer to the Apple TV (also $99), the Vizio Co-Star brings a refreshing reincarnation of Google TV to the world of set-top boxes.
[*]Notable tech specs:
[*]Google TV platform
[*]Wi-Fi and Bluetooth enabled
[*]Hot buttons for Amazon, Netflix, and M-Go
[*]720p, 1080i, and 1080p resolution support
[*]MP3, AAC, and WMA audio playback
[*]Universal QWERTY remote with trackpad

Step 2
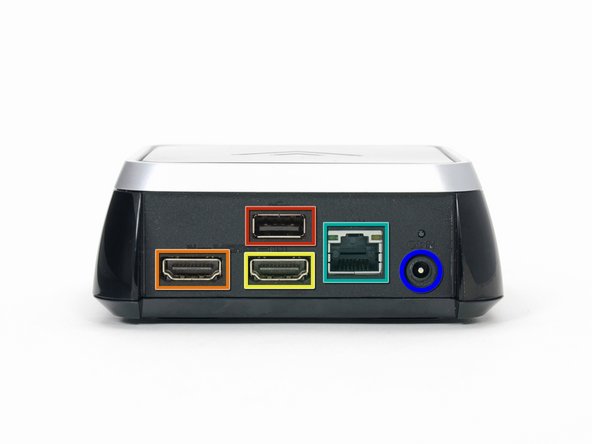
The rear side of the Vizio Co-Star includes an impressive lineup:
USB 2.0 port

[*]The rear side of the Vizio Co-Star includes an impressive lineup:
[*]USB 2.0 port
[*]HDMI-In port
[*]HDMI-Out port
[*]Ethernet port
[*]DC-In Power port
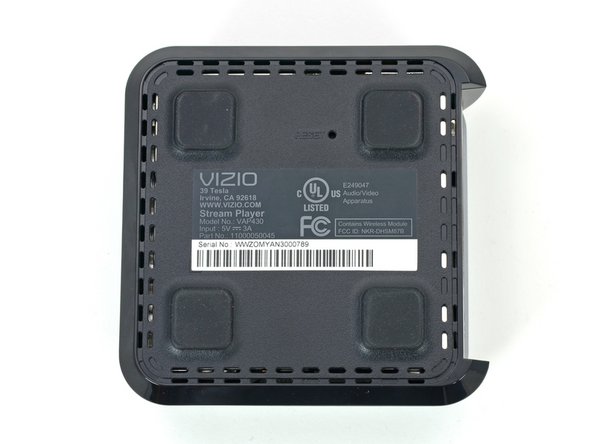
[*]On the bottom we see the reset switch and four suspicious-looking rubber feet.
[*]Spoiler alert: the feet aren't hiding anything.

Step 3

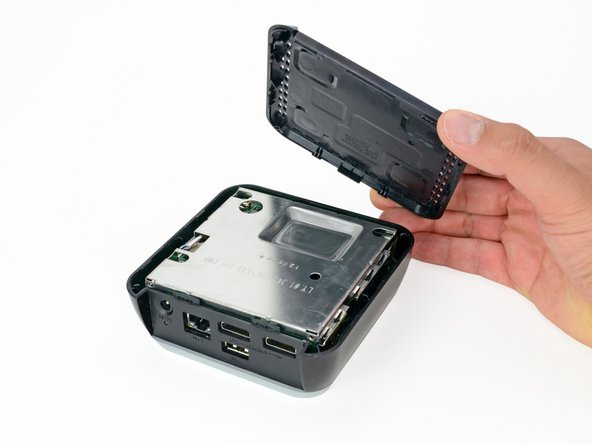
A little prying around the edge with a plastic opening tool, and we've got the bottom panel free.
Comparatively speaking, the Apple TV required two metal spudgers to open, as opposed to a single plastic opening tool here. No need to split hairs; they're both easy to open up, and we love it.


[*]A little prying around the edge with a plastic opening tool, and we've got the bottom panel free.
[*]Comparatively speaking, the Apple TV required two metal spudgers to open, as opposed to a single plastic opening tool here. No need to split hairs; they're both easy to open up, and we love it.

Step 4
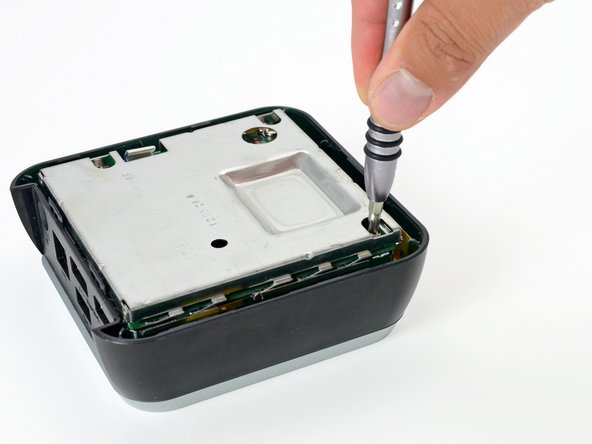
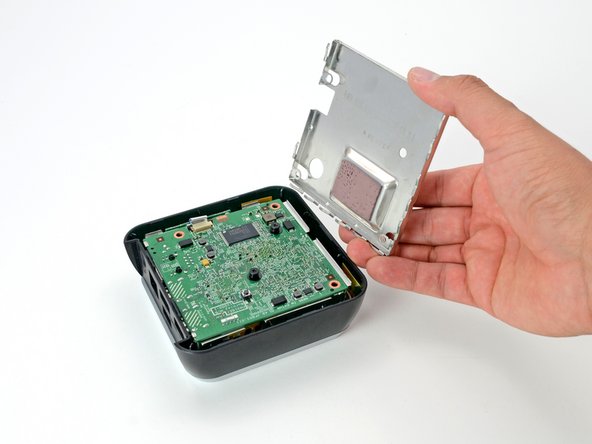
We pull off what looks like an EMI shield only to find a thermal pad sitting on top of a sea of small resistors.
It's not often that we encounter cooling for the back side of a motherboard, but Vizio took extra precautions as this Co-Star has no fans.


[*]We pull off what looks like an EMI shield only to find a thermal pad sitting on top of a sea of small resistors.
[*]It's not often that we encounter cooling for the back side of a motherboard, but Vizio took extra precautions as this Co-Star has no fans.
Step 5

The only thing standing between us and the motherboard are some screws and two connectors. Say hello to our little friend!
For those of you tuning in at home, a grand total of five screws and two cables must be removed once inside the device to free the motherboard. That's going to give the Co-Star a nice ratings boost.


pcvGgtTexuPHlEFD.medium

The only thing standing between us and the motherboard are some screws and two connectors. Say hello to our little friend!
For those of you tuning in at home, a grand total of five screws and two cables must be removed once inside the device to free the motherboard. That's going to give the Co-Star a nice ratings boost.

Step 6
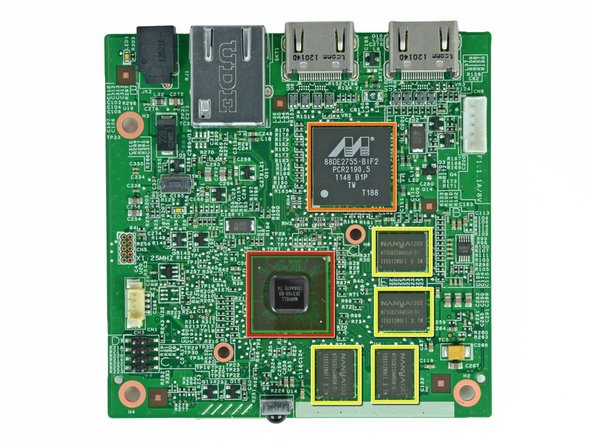
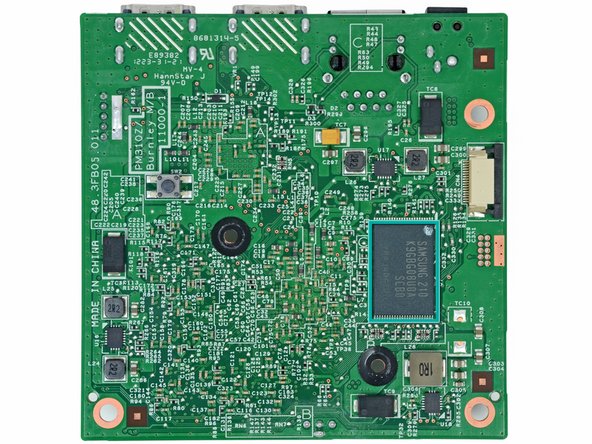
And here comes the Co-Star's motherboard strolling down the red carpet:
Marvell Armada 1500 1.2 GHz Dual-Core Processor

[*]And here comes the Co-Star's motherboard strolling down the red carpet:
[*]Marvell Armada 1500 1.2 GHz Dual-Core Processor
[*]Marvell 88DE2755 QDEO Video Processor
[*]Nanya NT5CB256M8GN-DI 2 Gb DDR3 SD RAM (2 Gb x 4 for 1 GB total RAM)
[*]Samsung K9GBG08U0A-SCBO 32 Gb (4 GB) NAND Flash

Step 7
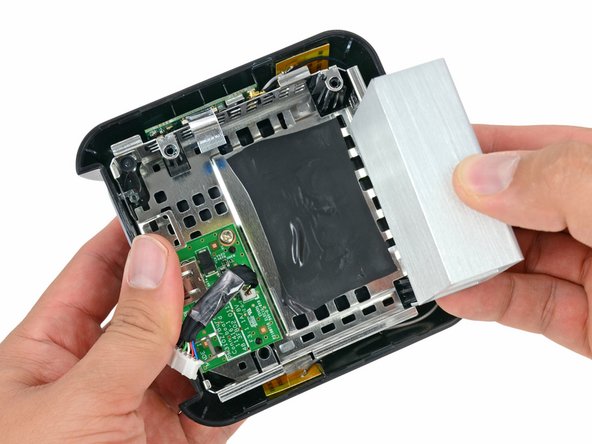
We're used to the innards of devices being dominated by a single component, but those space hogs are usually batteries or power supplies.
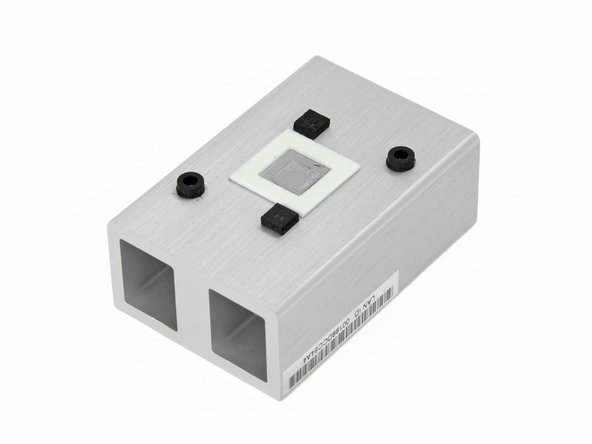
Over a third of the real estate in the Co-Star is inhabited by the aluminum heat sink.

[*]We're used to the innards of devices being dominated by a single component, but those space hogs are usually batteries or power supplies.
[*]Over a third of the real estate in the Co-Star is inhabited by the aluminum heat sink.
[*]You may be asking yourself why the Co-Star has such a huge heat sink?
[*]The answer lies in air movement. Without fans to circulate air, there is no forced convection. Therefore, the Co-Star must rely on conduction and natural convection to keep the processor cool
 

ashley

Member
Step 8

[*]We remove an additional board to reveal a whole lot of nothin' underneath.
[*]The board houses the USB port and, well, nothing else.

We remove an additional board to reveal a whole lot of nothin' underneath.


Step 9

We use our always-trusty spudger to disconnect the Bluetooth and Wi-Fi antenna cables from the wireless board.
A Marvell Avastar 88W8787 WLAN/Bluetooth/FM Single-Chip SoC brings life to what would otherwise be a very bland and boring board.


GEEOGiwXOOKLlKFc.medium

  • We use our always-trusty spudger to disconnect the Bluetooth and Wi-Fi antenna cables from the wireless board.

  • A Marvell Avastar 88W8787 WLAN/Bluetooth/FM Single-Chip SoC brings life to what would otherwise be a very bland and boring board.
Step 10

A plastic opening tool and a steady hand are all we need to separate the Bluetooth and Wi-Fi antennas from the Co-Star's lower case.
This antenna cable is too short.

  • A plastic opening tool and a steady hand are all we need to separate the Bluetooth and Wi-Fi antennas from the Co-Star's lower case.
  • This antenna cable is too short.
  • This antenna cable is too long.
  • This antenna cable is just right!
Step 11


That's pretty much it for the Co-Star, but we do like to do a thorough teardown here at iFixit, so we took a quick look at this flashy silver bezel. It sadly revealed nothing more than a flashy silver bezel.
Modders, take note: the bezel comes off easily and would probably look pretty slick when painted neon green.

  • That's pretty much it for the Co-Star, but we do like to do a thorough teardown here at iFixit, so we took a quick look at this flashy silver bezel. It sadly revealed nothing more than a flashy silver bezel.
  • Modders, take note: the bezel comes off easily and would probably look pretty slick when painted neon green.
Step 12

Just like the Boxee Box, the Co-Star comes with a neat two-sided remote.
Unlike the Boxee Box though, this Vizio controller is universal and features a touch-sensitive trackpad. Point, Co-Star.


  • Just like the Boxee Box, the Co-Star comes with a neat two-sided remote.
  • Unlike the Boxee Box though, this Vizio controller is universal and features a touch-sensitive trackpad. Point, Co-Star.
  • As a finishing touch, the Co-Star remote has ABXY buttons and a directional pad for OnLive gaming. Not only is that an incredibly unique feature, it gets us all nostalgic and stuff.
Step 13


The battery tray comes right out, but this isn't much of a surprise. How often did you try to "fix" your TV remote by pulling out the old batteries and just switching them around?
A pair of AA batteries were included for the remote. That's a legitimate selling point right there.

  • The battery tray comes right out, but this isn't much of a surprise. How often did you try to "fix" your TV remote by pulling out the old batteries and just switching them around?

  • A pair of AA batteries were included for the remote. That's a legitimate selling point right there.
Step 14

Here's another opportunity for the modders out there. How cool would it be to have a neon green keyboard bezel to match your Co-Star?
Whether you're painting it or not, the bezel pries off the keyboard quite easily.
Following suit, the rubber button cover peels off without a problem.

  • Here's another opportunity for the modders out there. How cool would it be to have a neon green keyboard bezel to match your Co-Star?
  • Whether you're painting it or not, the bezel pries off the keyboard quite easily.
  • Following suit, the rubber button cover peels off without a problem.
  • Since the button cover and the bezel are the components that usually get the dirtiest, it's great they are easy to remove.
 

ashley

Member
Step 15

Buttons on both sides mean lots of data transfer. Luckily, the data cable slides out from connectors on both PCBs.
The Co-Star's remote looks to be as easy to take apart as the media player itself.

  • Buttons on both sides mean lots of data transfer. Luckily, the data cable slides out from connectors on both PCBs.
  • The Co-Star's remote looks to be as easy to take apart as the media player itself.
  • Once again, this isn't really a surprise. Remotes, unlike smartphones or laptops, aren't subject to strict space constraints.
Step 16

WNNL46yBV1Oqu5aG.medium
WAjcXatFeXDKSNnv.medium

  • The keyboard backer sports a couple of ICs:
  • Maxim MAXQ610 16-bit Microcontroller with Infrared Module
  • Broadcom BCM20733 Human Interface Device Bluetooth 3.0 single chip
Step 17

bosgqIHvw4r5sObA.medium
j1csMdW6scMsHfNW.medium


HyPEMTlukFgsSYIo.medium
  • A few Phillips #0 screws and some prying and the lower case of the remote is gone. See ya!
  • With the case removed, we learn the screws were pulling double duty and holding the motherboard in place.
 

ashley

Member
Step 18

Yoink!
We grab a handy pair of tweezers and gently pluck out the trackpad data cable before removing the other board.
This board is powered by a Renesas R5F2133 16-bit microcontroller.
  • We grab a handy pair of tweezers and gently pluck out the trackpad data cable before removing the other board.
  • This board is powered by a Renesas R5F2133 16-bit microcontroller.
  • No flash photography, please, but this PCB does host the two IR blasters, with one conveniently on the side for the QWERTY keyboard.
Step 19

qutVi6hGeZGbupZo.medium
BY2ZRbShMWqMK2iL.medium


H1LyZBddmpfbcGjN.medium
  • Peeling back the remote's keypad is as easy as peeling a banana. Underneath is the capacitive touch trackpad.
  • A lot of strong adhesive is used to hold this board in place.
  • If this comes loose, your movie night will be gone with the wind, hence the generous amount of adhesive.
  • Excess adhesive usually doesn't get in our way. With a little bit of patience, our guitar picks, and a spudger, we free the trackpad from the frame.
Step 20

peXVZcuKTQiEnTcu.medium
6iEZetqUA5F4smuf.medium

  • The trackpad is controlled by the popular Synaptics T1021A Touch Controller, also used in the Logitech Revue.
  • Which reminds us, it's time to revue the Vizio Co-Star's repairability.
 

ashley

Member
Step 21

m1m61qbcMWaZOB6x.medium

  • Vizio Co-Star Repairability: 8 out of 10 (10 is easiest to repair)
  • The outer case only requires a little bit of prying with a plastic opening tool to open.
  • The only screws used in the Co-Star are standard Phillips #0.
  • Most of the components are easily accessible and thus easily replaced in case of failure.
  • Removing the remote's QWERTY keypad is painless, making regular cleaning a relatively simple task.
  • An abundance of glue securing the trackpad to the front of the remote makes removal difficult.
 
Top